Monster+ FAQs
Monster’s newest job posting platform has arrived! Although the new, user-friendly experience is extremely intuitive, you might come across some questions from time to time. This is where you will find all of the answers when it comes to posting jobs, promoting them, and managing your Monster+ account.
Posting Jobs
Managing Jobs
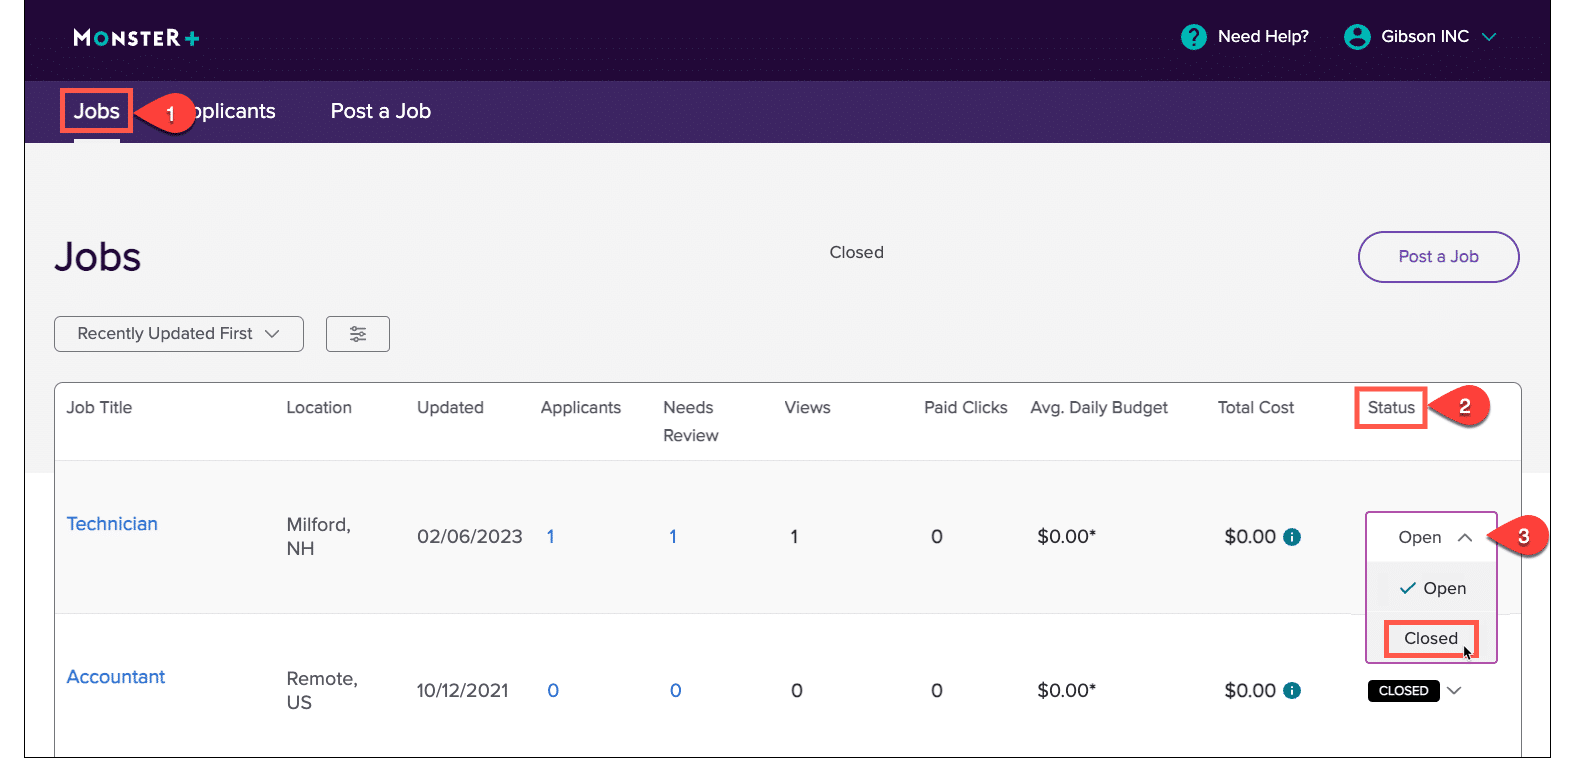
Back to topYou can now manage your jobs and promotions at any time – right from your Monster+ account. If you’d like to stop a promotion, follow these steps:
- Go to the Jobs page of your Monster+ account.
- Click on the Status dropdown menu.
- Select Closed to end the promotion and remove it from Monster. Keep in mind that any charges accrued before the promotion was stopped will be settled at the end of your billing cycle.
If you’d like to promote that same job in the future, it will remain on your Jobs page. Simply change the Status to Open when you’re ready to continue the search.
Please note that these are independent actions: Closing a job will not cancel your subscription, and canceling your subscription will not close your jobs.
Promoting Jobs
Back to topManaging Applicants
Back to topResume Search
Back to topMonster Credits
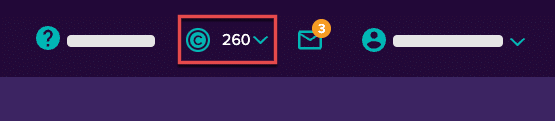
Back to topYou need to have a Monster+ Pro subscription to receive an allotment of Monster Credits each month. Log into Monster+ and click on the credit icon at the top of the page to learn more. Then, click the Upgrade button to purchase the Pro plan.
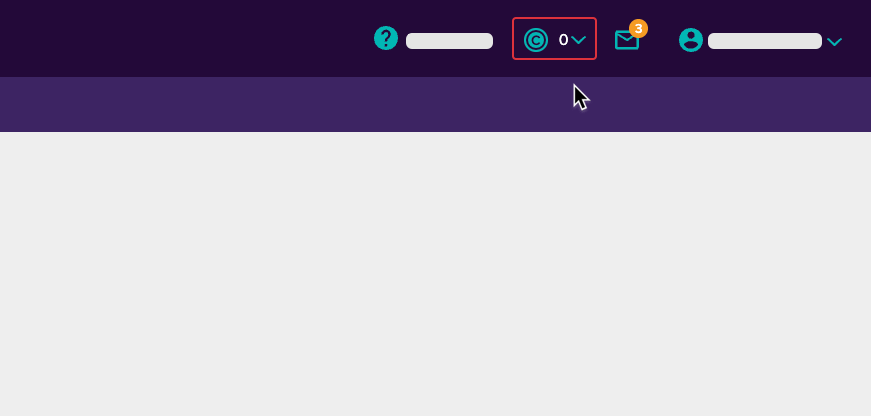
When signed in to Monster+, your Monster Credit balance is prominently featured at the top of the page. Click on it to view your spending history. This number refreshes about every 30 minutes, so it should be a great reference point when considering budget and usage.
Billing/Payment
Back to topIt depends on your plan:
- If you have an Annual Plan with Monster+, contact your Sales Representative for assistance.
- Monster+ Standard Plan Customers: To stop further charges, simply close your job(s).
- Monthly Monster+ Pro Plan Subscribers: To stop further charges, you must do two things:
- Cancel your monthly subscription.
- Close your jobs.

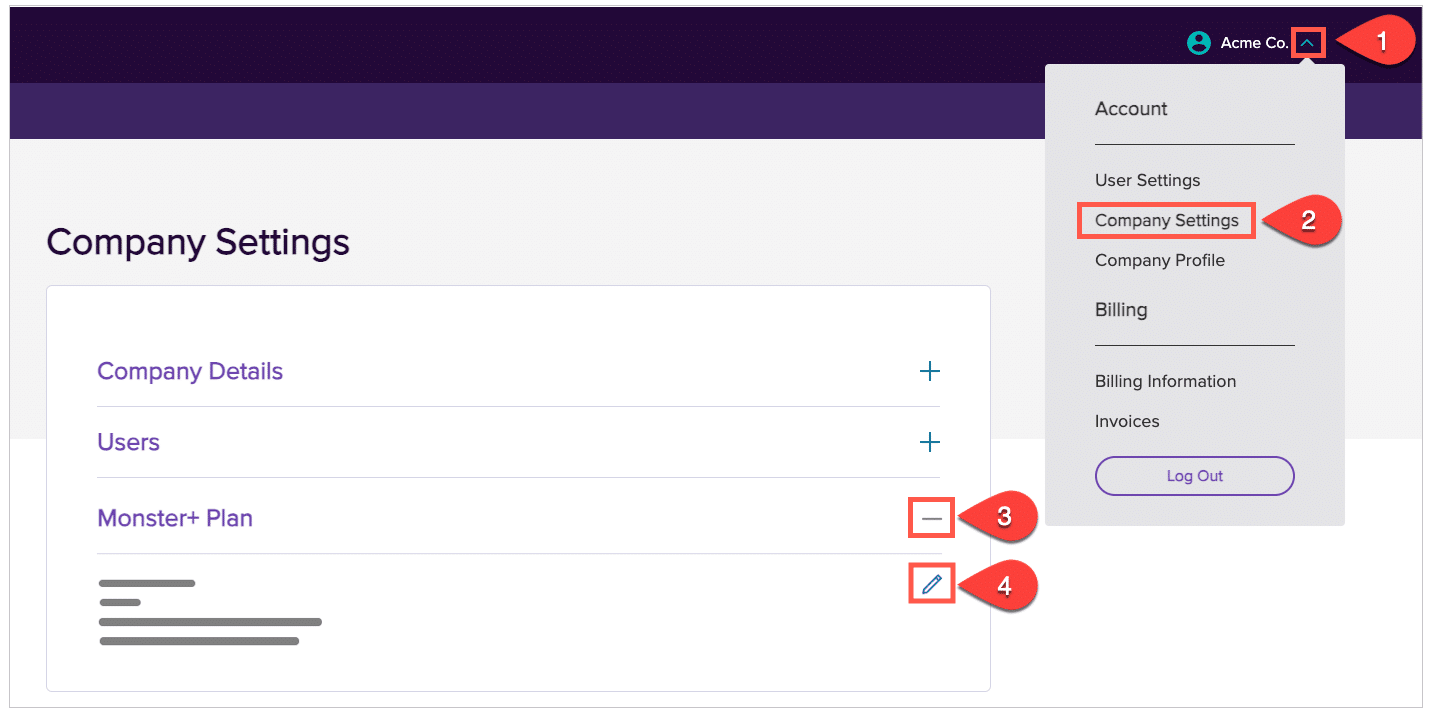
To cancel your Monthly Pro Plan monthly subscription:
- Select Company Settings from the Account menu at the top of the page.
- Click to expand the “Monster+ Plan” to review your current enrollment.
- Click the pencil icon and select the pay-as-you-go Standard Plan.
You will have access to your Pro Plan features until the end of the current billing cycle. Just know that once you downgrade you will no longer have access to Monster’s Resume Search and additional users will no longer have access to your account.
To close a job:
- Go to your Jobs page and review the status column.
- Click the dropdown menu and change the status of the job from Open to Closed.
Once your jobs are closed or expired, you will not receive any charges from that point forward. When the billing cycle ends, you will receive an invoice for charges accrued while your jobs were open.
Are you a traditional Monster subscriber looking to cancel? Click here.
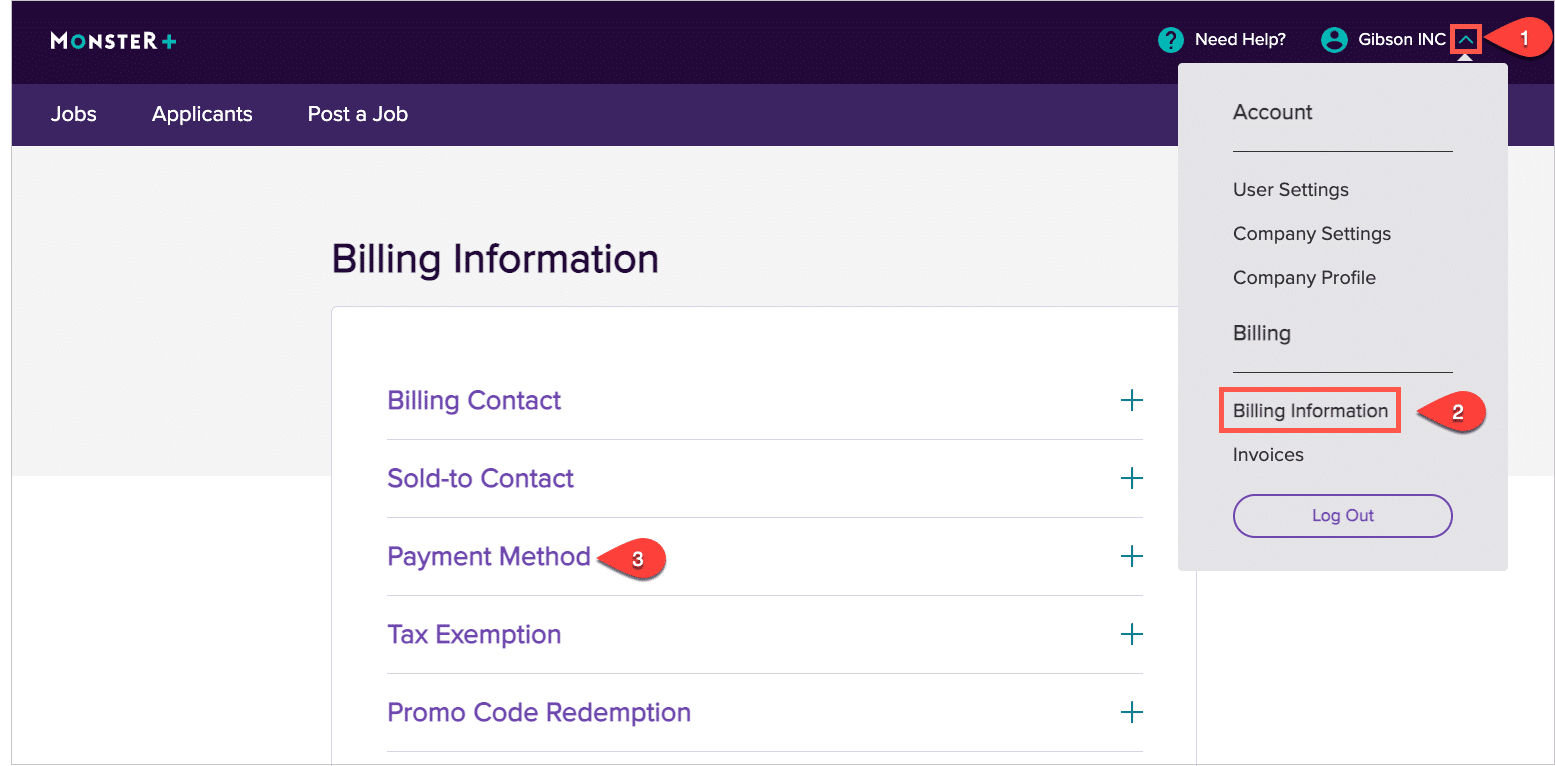
If you need to change the payment method or billing information associated with your Monster+ account, it’s a quick and easy process.
- Sign in to Monster+ and click on the dropdown menu next to your account name.
- Select Billing Information from the list.
- Click on Payment Method to expand the options available to you and make any payment updates.
When you’re ready to put a special offer to good use, sign in to Monster+, or create a new account. Then, follow the steps below:
- Open the menu next to your account name (top right).
- Select Billing Information.
- Expand Promo Code Redemption to enter your code, then click Apply.
The promotional offer, discount, or credit will be applied to your account and available for use immediately. Just know that Monster+ promotional codes do expire, so make note of the offer details and take advantage of the savings as soon as possible. 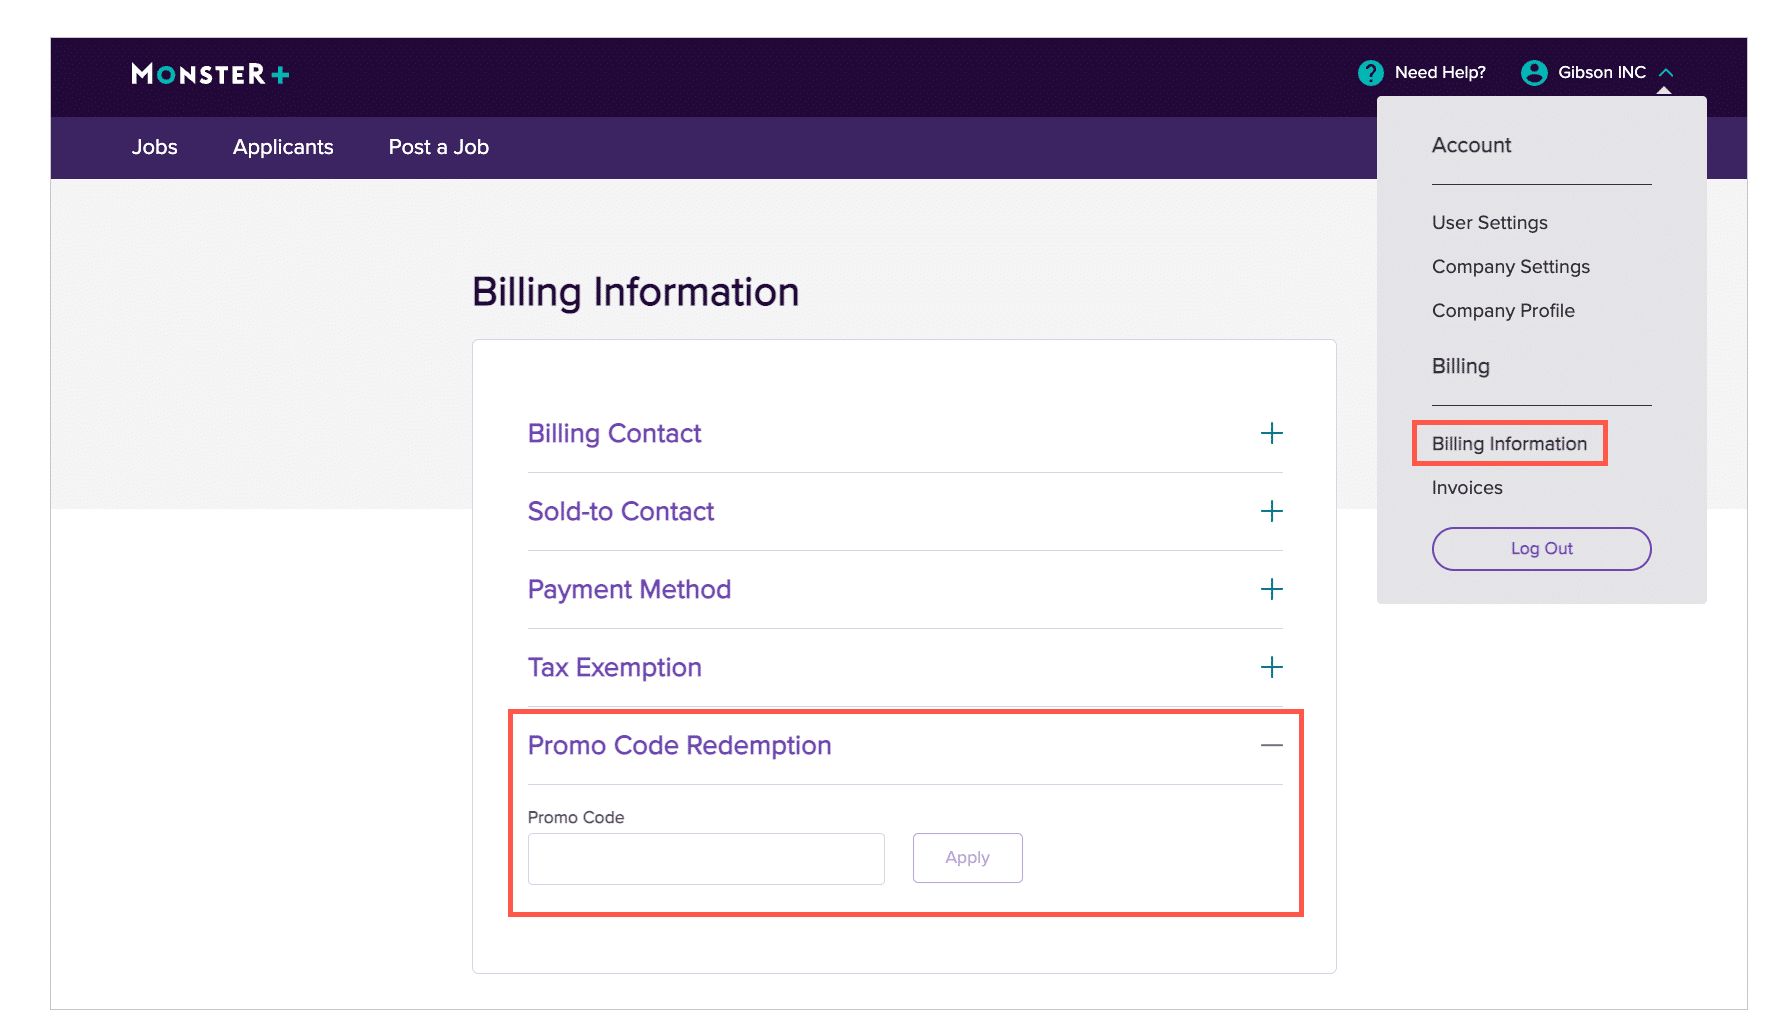
You will be charged for promotions that were active during your 30-day billing cycle. Check the dates of your active promotions on your invoice. To review your invoices, follow these steps:
- Sign in to Monster+ and click on the dropdown menu next to your account name.
- Select Invoices to view all of the invoices you’ve received to date.

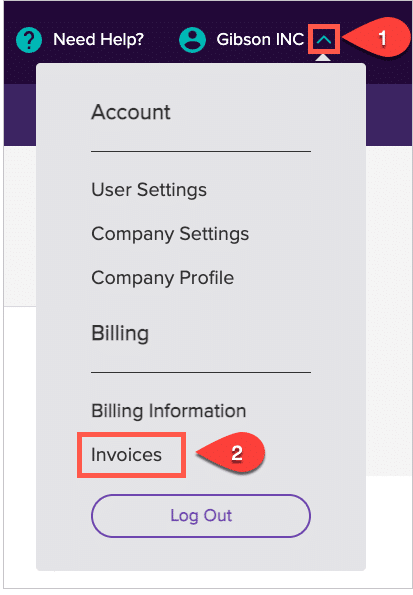
Please note the date of your billing cycle. The promotion charges are outlined and dated to show what was accrued during that cycle.
If you believe you were charged in error or have questions, reach out to customer service or our Credit & Collections department:
Credit & Collections
Monster Worldwide, Inc
MonsterInvoiceNA@monster.com
Tel: 888-506-6543
You can find your Billing Information in the user icon dropdown menu. On the Billing Information page you can confirm and edit your billing contact information, stored payment information, as well as your tax information and exemption status.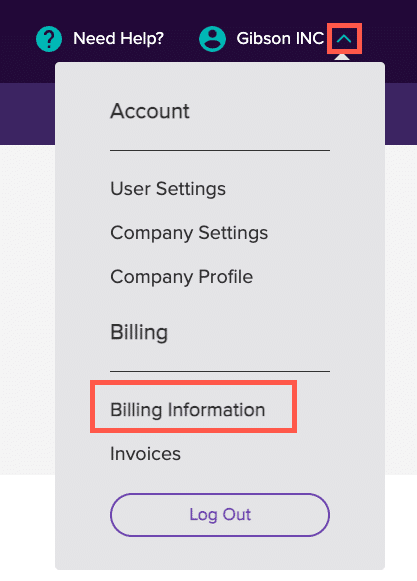
For your convenience, Monster will email your invoice to you on the day your payment is processed. Invoices are also stored in your Monster account. To review your invoices, follow these steps:
- Sign in to Monster+ and click on the dropdown menu next to your account name.
- Select Invoices to view all of the invoices you’ve received to date.

Please note the date of your billing cycle. The promotion charges are outlined and dated to show what was accrued during that cycle.
My Account
Back to topYes, you can change your plan anytime. Just follow these steps.
- Sign in to Monster+ and click on your account name at the top of the page.
- Select Company Settings from the menu.
- Select “Monster+ Plan” to review your current enrollment.
- Click the pencil icon to get a detailed view of Monster+ Plans and choose the one that works best for you.
Browser Settings & Privacy
Back to topFor additional information, visit our Monster+ Job Postings page.