Creating and Posting Jobs
Learn how you can easily create your job ad and post it on Monster. Watch a quick how-to video, or review the step-by-step instructions below.
First, sign in to your Monster account and click Post A Job on the top of the page. You will be directed to the Post a Job page where you can enter all of your job details in just minutes.

1. Posting Shortcuts
If you previously saved a job ad to the Hiring Library, select if from the Use Saved Jobs dropdown menu. This will auto-populate the fields below with the information that was previously saved. If you have a branded job template you can select it from the Use Layout Templates option.

2. Job Information
Complete the entries in the Job Information section. You will be required to enter a:
- Job Title
- Job Location (If this is a remote role, click No fixed location.)
- Job Type
- EEO-1 Job Classification
Although salary information is not required, Monster does recommend including it. This transparency can increase response rates.

3. Job Description
This is where you will be adding the text of your job description. You can use one of our sample job descriptions, upload your own, or type it directly into the text box. Follow along the numbered image and descriptions to learn more about the actions in this section.
- If Monster has a sample job description that matches your job title, it will pre-populate in the text box. To use it, click USE at the top of this section and you can make any edits you’d like.
- Use the formatting bar to bold headings, bullet your text and emphasize important elements of your job description.
- To start over, click Clear and all of the text will be removed from the text box.
- For ease, you can also upload your document and it will be placed into the text box.
- If you would like to search our database of sample job descriptions, click View Other Descriptions and a search bar will appear.
- We ask that you preview your job description to ensure it meets your expectations.

4. Company Information
Add/change information in the Company Information section, if needed. You can also select to Keep company name confidential by checking the box under the Company name.

5. Apply Method
Think about how you want candidates to apply to your jobs. The Standard apply will be easiest for candidates and may bring in more applications. If you prefer to have candidates apply through your ATS, you have the option to provide a link to direct candidates to your apply flow.

6. Contact information
If you would like to display your company contact information in your ad, check the box and complete the contact name and other details.

7. Hiring Library
If you would like to save this job ad for future use, check the box next to Save Job to Hiring Library. All the information will be saved to your Hiring Library and can be edited any time.

Click Preview to view the ad, Continue to proceed to the next page, or Save for Later to complete the ad at a later time.

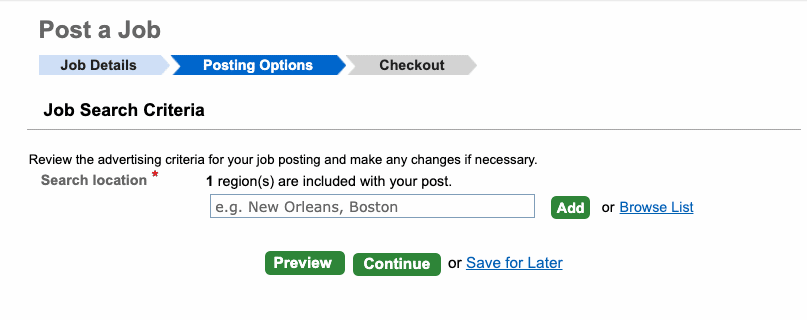
8. Posting Options
If you entered a physical location for this job on the previous page, you will see that the search location is pre-populated.
If you selected “no fixed location” on the previous page, you will need to enter a search location and click Add before continuing.
Click Preview to view the ad, Continue to proceed to the next page, or Save for Later to complete the ad at a later time.
9. Job Ad Complete
Once your job ad is complete, you will be brought to a Thank You screen. You can view your job posting, set up auto-reply letters, manage your job postings or post another job right from this page.
