Manage Candidates in Folders
Managing candidates can be challenging. Luckily Monster makes this easy! There are several actions that will help you to organize your candidates – regardless if you receive job applications or find candidates in the resume database.
Getting started
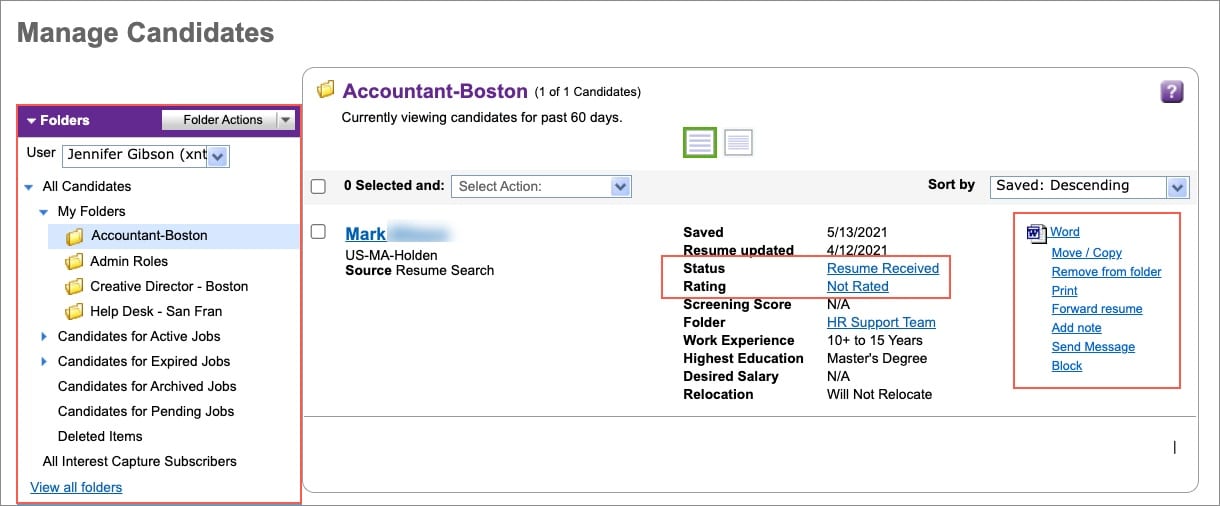
Hover over My Candidates in the menu and click on Manage Candidates.

Folders
You’ll find all your candidate Folders in the box on the left hand side. During the recruiting process you can easily create more folders, add and manage candidates.
Sharing Resumes (Download & Forward)
If you would like to download a resume for your ATS, just click on the PDF or Word icons shown on the right column of the candidate information and your download will begin.
You can also forward the resume to your colleagues by clicking Forward resume. This will launch a message window that will allow you to send it to multiple email addresses at a time – just separate each recipient with a comma.
If you use the check boxes next to the candidate names to forward multiple resumes at once, each candidate will be delivered to your recipients in a separate email.

Send message
You can send a message to just one or multiple candidates at once. If you want to send a message to one person, just click on Send message in the candidate overview.

If you want to send a message to multiple candidates, then select those candidates using the check boxes. Then go to the Select Action dropdown menu and choose Send message to selected from the drop-down menu.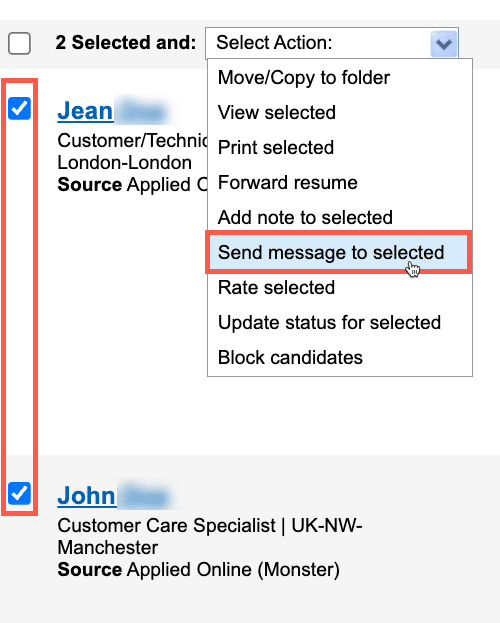
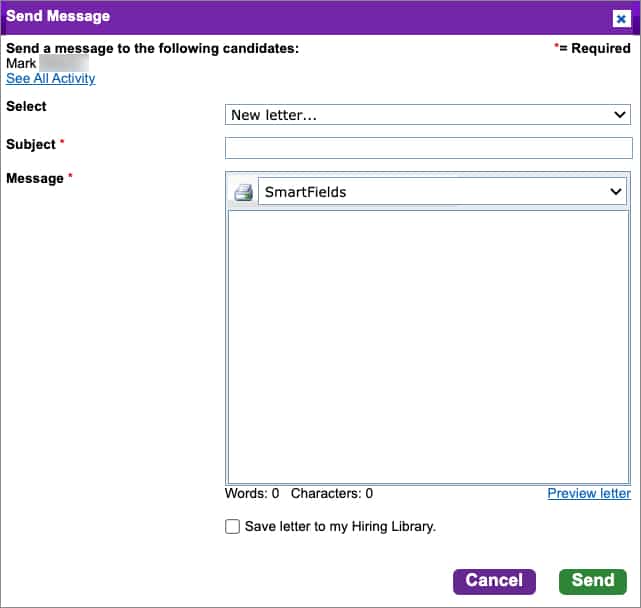
You can choose to create a New letter or select a Saved letter. If you will send the same letter to multiple candidates, don’t forget to insert Smart Fields. These will personalize each candidate’s letter. You can then Preview your letter and when complete, remember to check Save letter to my hiring library so that you can use your message in the future. To complete the process, simply click Send.
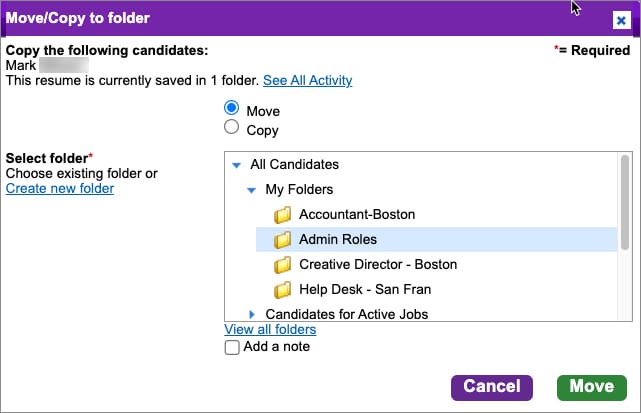
Copy or Move a Candidate
You are able to move or copy a candidate’s resume and profile in to more than one folder. Just click on Move/Copy in the candidate overview. Choose if you want to move or copy the candidate, pick an existing folder or create a new one and you’re done. You can also add a note that can be viewed company-wide or just by you. Finally, click on Copy or Move to save your selections.
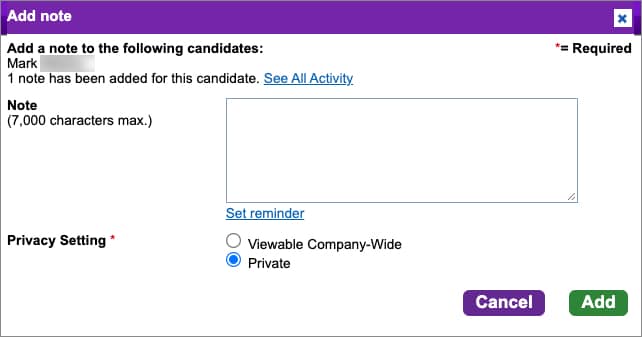
Add a Note
A note captures your thoughts and activities (phone calls, interviews, etc.) related to a candidate which you can always come back to later. Click on Add note in the candidate overview. Enter your note and set a reminder, also if needed select your privacy settings below. Click Add to save your note. When you click on a candidate to view their resume in the future, all of the notes that have been added will be shown in the Activity tab.
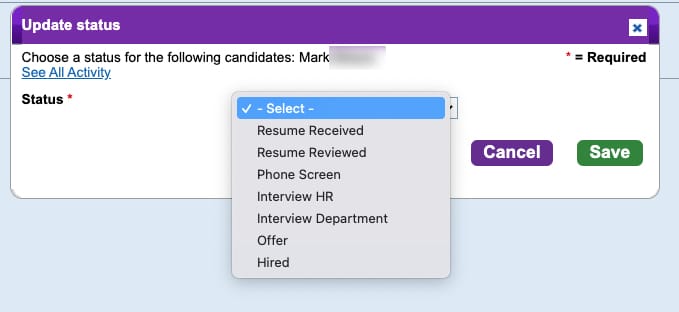
Update Status
Update the status to keep track of a candidate’s progress through the recruiting process. This will help you to keep track and it can also be very helpful if a colleague needs to take over your work. In the candidate overview click next to Status and select the appropriate candidate status from the drop-down menu. It is then possible to sort your candidates in folders by their status. Simply go to the Filter options on the left hand menu side and click the Status drop-down menu to select a filter.
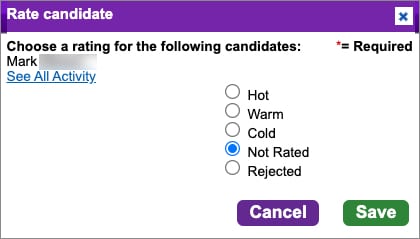
Rate a Candidate
Give candidates a rating so you can compare them. In the candidate overview you can click on Rating, select a rating and Save it. When you are reviewing all your candidates in a folder, you can sort them by rating. Simply go to the filter options on the left hand menu and click the Rating drop-down menu to use this filter.
Block a Candidate
If you would like to block a resume that is not a good match and may have been reviewed previously, you can block that resume from being included in any further single or bulk actions. Simply click on Block, in the candidate overview. This will be a mark that the candidate is blocked and although the name and place holder for the candidates profile will be displayed, it will not allow any actions to be taken until you choose to unblock them again

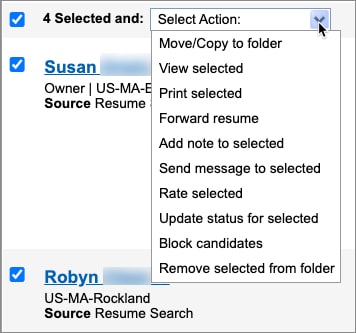
Bulk Actions
All the actions listed above are also possible to complete with a Bulk Action. Go to any folder, select one or more candidates and click on Select action. From the drop-down menu you can then choose the actions listed.
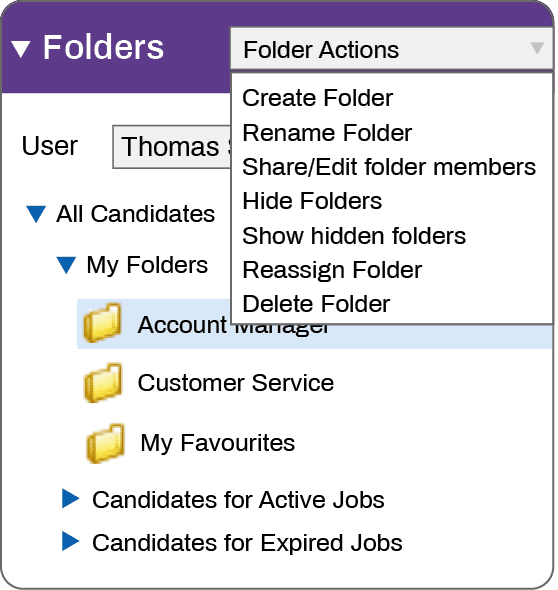
Managing your Candidate Folders
Managing your folders well, could help you during the recruiting process. Click on your folders on the left hand menu and click on Folder Actions. You can then choose the Folder Action from the drop-down menu.