Searching Best Practices
Ready to take your search to the next level? Check out the following tips to make every search a success.
Tip #1: Know Your Search Options
You can include more search options and manage your search settings in the bottom right corner of the search bar. Click on Advanced Options to see additional search options.

Available options:
- Limit results to candidates willing to relocate
- Work Authorization
- Company
- School & Degree
- Exclude Keyword
- Candidate Name – Great for cross-referencing candidates found on other platforms!
- Job Type
- Language Proficiency
- Desired Candidate Salary
- Willing to Travel
- Resume Updated
- Education
Attention Boolean Users
-

If you would like to use Boolean, select Boolean Keyword Search under the search bar. Enter your keyword search string and click the Search button.

Tip #2: Set up a Skills Match
When you first begin searching for a new position that you’ve never recruited for, it will be helpful to find a model candidate to help develop your search criteria. Start with a nationwide search first to find a candidate with an ideal skill set that you can leverage for your own search. To do this, only enter the Job Title and one Keyword and then click the search button.

- Once you find a standout candidate, scroll down to the Skills/Other Skills section of the Monster Profile. Expand the list to reveal every skill on the resume, translated into Monster concepts. Identify the skills that are important to the position.
- To include them in your search criteria, click the plus icon next to Skills/Keywords, then “Add Another.” Enter 5-10 skills and mark them as required if necessary.
- Once all of your criteria is entered, click Update to refresh your results on the page.

Tip #3: Use a Broad Job Title
Keep titles broad and do not include skills or career levels here. Use Skills/Keywords to narrow the focus and results. For example, if you are looking for a Software Project Manager, search for “Project Manager” as the job title and insert “Software” as a skill.
Although Monster will search all job titles in the resume, it will give priority to the job titles most recently held.

Other Job Title Tips
-
- A job title is recommended but not required. You can add up to 5 titles within your search.
- Titles should be industry standard. Avoid internal titles.
- Search for a title that candidates would put on their resume.
- Try searching different titles and see which one shows you the most relevant candidates.
Tip #4: One Entry per Field
Make sure to only enter one entry per field. If you have multiple entries you’d like to include, click on the
Add another… link to reveal a new field.
You should also avoid numbers and non-text characters like symbols and exclamation points. (!,”,*,$)
INCORRECT

CORRECT!

Suggestions Save Time
-
 The type-ahead feature serves up the most popular list of concepts, and it will search beyond what is displayed to give you the best candidate matches. Just remember, it is not mandatory to select one. If you don’t see what you’re searching for it’s ok to enter your own.
 The type-ahead feature serves up the most popular list of concepts, and it will search beyond what is displayed to give you the best candidate matches. Just remember, it is not mandatory to select one. If you don’t see what you’re searching for it’s ok to enter your own.
Tip #5: Search for It All with Skills (and Keywords)

You should always enter skills and start with the most important requirements for the job. In addition to skills, feel free to enter an industry, languages (both spoken and programming) and even certifications. Add up to 20, but we recommend 3-5 to start.
A Required entry will only bring back resumes that include the entry. If it is not marked as required, resumes that do have it will be ranked higher in your list of results, and resumes that don’t have it will be included in your results as long as they meet the other search criteria.
Skills-Only Searches
-
You can perform a skills-only search, and omit the job title. Use this strategy to source a variety of roles within the same department, or fill a unique role that doesn’t fit a typical job title.
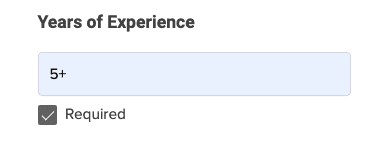
Tip #6: Enter a Range for Years of Experience
The “Years of Experience” field looks for the total experience on the resume. If you simply enter “5” and mark it as required, your search will only return candidates with exactly 5 years of experience. Monster recommends entering a range (e.g., 4-6), or a plus sign after the number (e.g., 5+) to view additional qualified candidates that are within close proximity to your target. Remember to mark as Required to return only the resumes that match your specifications.
Tip #7: Exclude Keyword

The Exclude keyword filter could be helpful if your search criteria is consistently bringing back a term that is close to, but not related to what you’re searching for, or something you don’t feel is related to your skill set.
It’s also a great way to exclude candidates who have previously worked for your company.
Tip #8: Use the Location field, or not.

Add up to 5 and enter everything from postal codes, city/town names or regions.
Utilize the radius dropdown to help broaden or narrow your search, but consider the location and density of population when adjusting the radius.
To search nationwide, leave the location field blank.
More Efficient Multi-Location Searches
-
Searching for multiple locations can be helpful if you have a few of the same open positions in different locations, are looking to fill a remote/telecommute position, or are filling a role in the organization that can be based out of any of your offices.
Tip #9: Search for All Resumes First

In the Resume Updated field, the search engine will default to search for all resumes as it is best practice to start with all the candidates before narrowing this filter. Here are a few reasons searching all resumes is the best place to start:
- Your ideal candidate could be currently employed, not actively looking, but open to considering an appealing offer.
- With a low unemployment rate, potential candidates may be in a more “passive” state. Even though their resumes aren’t updated, they could be open to the right opportunity.
-
Messaging candidates who have not updated their resume recently requires a compelling message. Sell them on your opportunity. You might be surprised how many responses you receive.
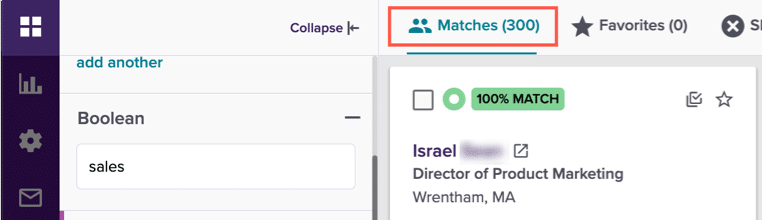
Tip #10: Narrow Your Results
We strongly recommend narrowing down your search with additional criteria until your results are in the 200-300 range. Then, you’ll know the candidates that you choose to contact will meet your specific qualifications.
Tip #11: Set up Search Notifications
To receive an email notification when new candidates who match your search are found, turn on the Enable Notifications switch at the bottom of your search criteria.

You can set the frequency for these notifications on the Saved Search Settings page from the left menu.

Bonus Tip: Access Your Saved Searches
All of the searches you perform will be available to you in the Saved Searches section of your SearchMonster Dashboard.

- Under your search bar, you will see Saved Searches. This is a record of all of the searches you’ve completed, conveniently saved for easy access in the future.
- Click on the name to return to your search page, review candidates, and adjust criteria or settings.
- If you have enabled notifications on a search you can see a bell in the top right corner.
- If an email campaign is activated within your search, this is where you will be able to view the performance metrics at-a-glance. Click on the icon to see the number of emails sent as well as the number and percentage of Opens and Clicks. Click on the icon again to get back to the overview.
- Clone your search to carry over all of the search criteria you’ve entered (excludes messages, favorites and notifications.) Archive your searches if you don’t need them at the moment and they will be stored in the Archived Searches tab. Delete is also an option, as long as no campaigns are running.
-
Tip: You can Archive or Delete multiple searches at a time by turning on “Bulk Actions” at the top of your saved searches.